Put a live map on your website
Drop your interactive map straight into your own site or post.
You want a map on your own website, blog post or report that people can actually move — pan it, zoom in, tilt it — not a flat screenshot they can only stare at. Embedding drops your live GeoCanvas map straight into your page, sitting right where you put it and fully interactive.
What you want to do
A real map, not a picture
A screenshot freezes the map at one zoom and one corner of the city. An embedded map is the real thing: a reader on your page can drag it around, zoom into their own neighbourhood and explore — without leaving your site and without signing in to anything. It's perfect for a story, a dashboard, an internal report or a client write-up.
Throughout these docs we use the demo NYC Taxi Zones map. Open the live example to see exactly what an embed looks like — the same map your visitors would get.
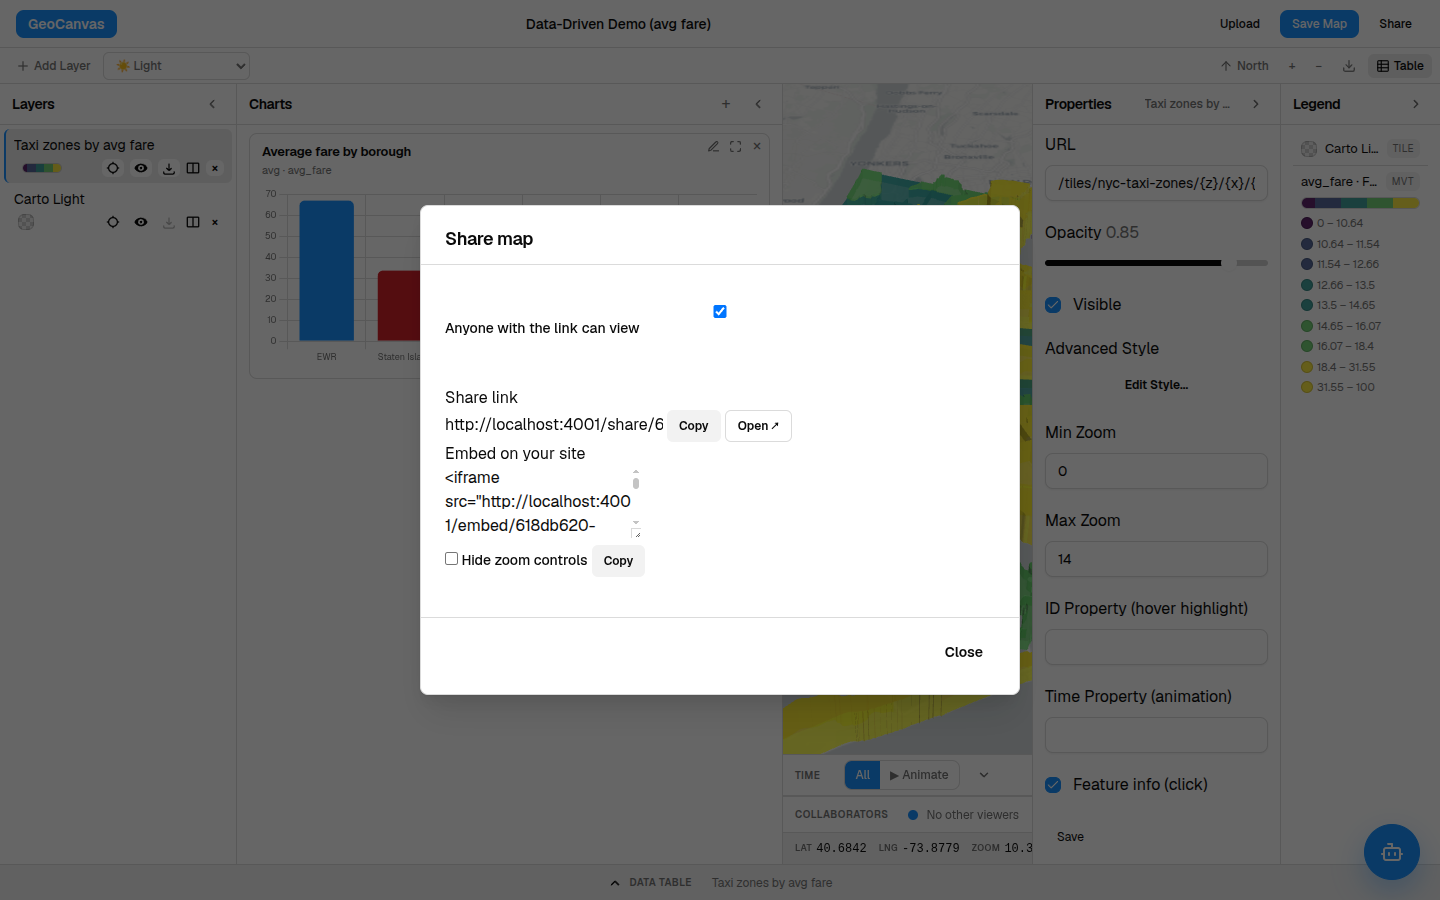
First, share the map
The map has to be public
An embed shows your map to everyone who visits the page, so the map has to be shared first. If you haven't already, click Share in the editor toolbar and turn on Anyone with the link can view. That one switch is the whole step — the full walkthrough is in Sharing maps.
Anyone who can open the page your map lives on can see it. Embedding makes the map public, so only embed a map you're happy for the world to look at.
Get the snippet
Copy the ready-made snippet
Still in the Share window, look just below the share link for the Embed on your site box. GeoCanvas has already written the little snippet you need — there's nothing to build yourself. Click Copy, then paste it into your own site wherever you'd like the map to appear: a blog editor, a page builder, a CMS, a report. The map shows up right there, live.
Make it fit
Tidy it up
Two small touches make the embed feel like part of your page:
- Hide the zoom controls. Tick Hide zoom controls in the Share window for a cleaner, calmer look — handy for a small map where the plus and minus buttons would crowd the frame. Copy the snippet again after you tick it.
- Size it to fit. The map fills whatever space you give it on your page, so it can be a slim banner, a tall sidebar or a full-width hero — whatever suits the spot you're dropping it into.
What visitors see
Clean and self-explanatory
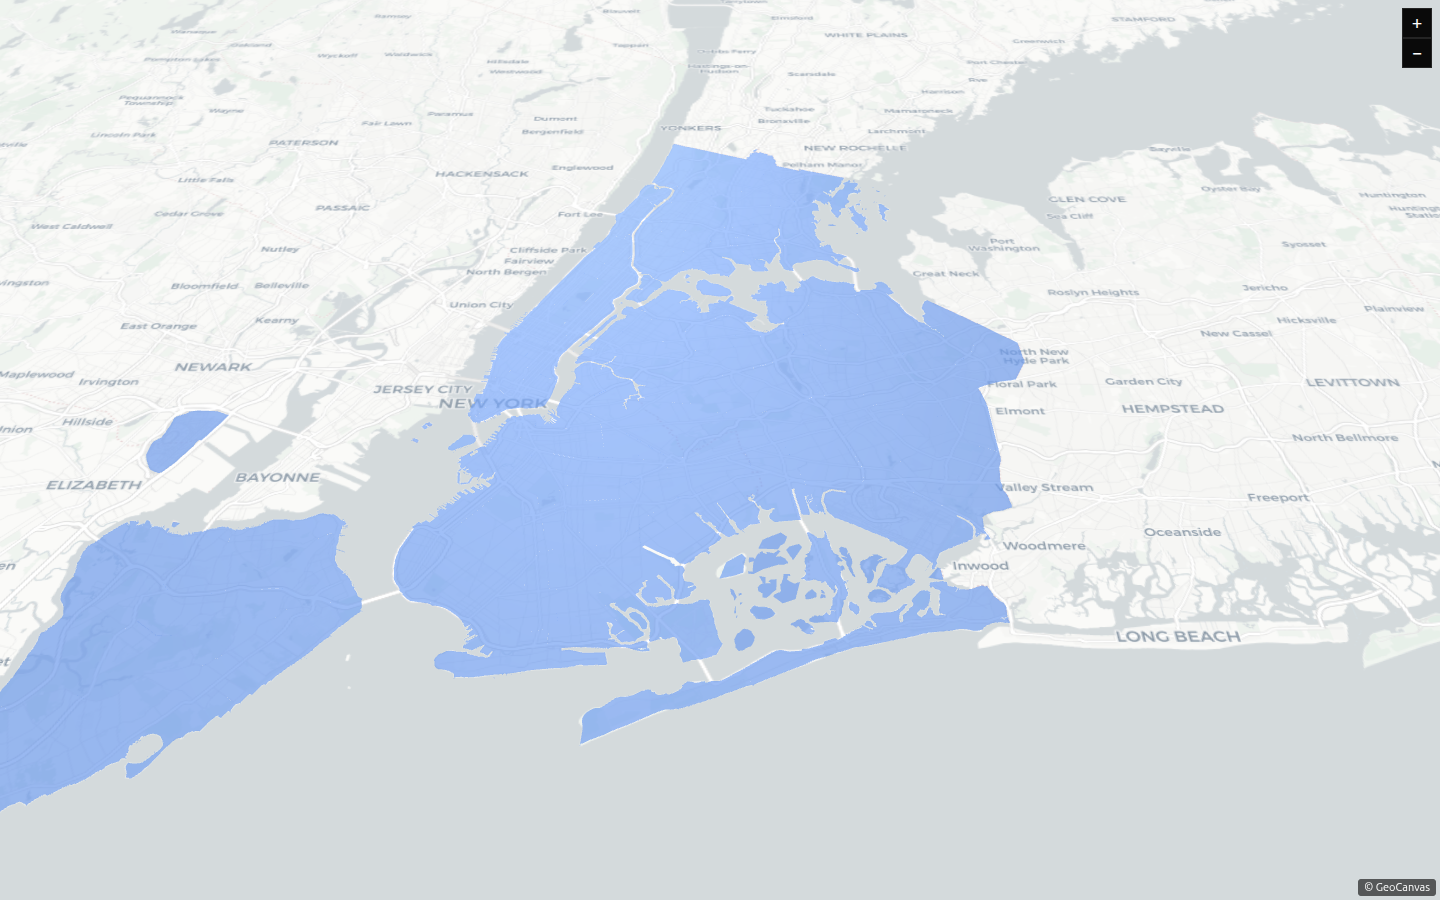
The embedded map is deliberately bare: no toolbar, no panels, no editor and no sign-in. Visitors get the map itself, the zoom buttons in the corner (unless you hid them) and a small GeoCanvas credit. They can pan, zoom and tilt — that's it, and that's the point.
Try it
Put the taxi map on a page
- Open Share. Click Share in the editor toolbar.
- Make it public. Turn on Anyone with the link can view so the embed will work.
- Hide the controls (optional). Tick Hide zoom controls for a cleaner look.
- Copy the snippet. Click Copy under Embed on your site.
- Paste it in. Drop it into your blog, CMS or report — the live map appears right where you put it.
Embedding is the drop-it-anywhere cousin of sharing a map — the same public switch, but the map lives inside your page instead of on its own. If instead you want people working on the same map together with live cursors, see real-time collaboration.